Doorless Shower with Glass Block Wall
Planning notes for the downstairs guest shower: a non-curbless, doorless walk-in shower with an opaque glass block wall on the showerhead side. Preferred layout is a modular 40″ glass block wall with a roughly 24″ entry, paired with a ceiling-mounted rain head to reduce splash through the opening.
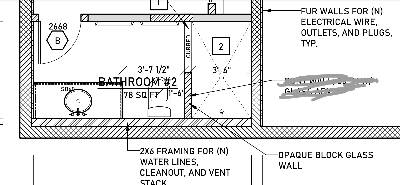
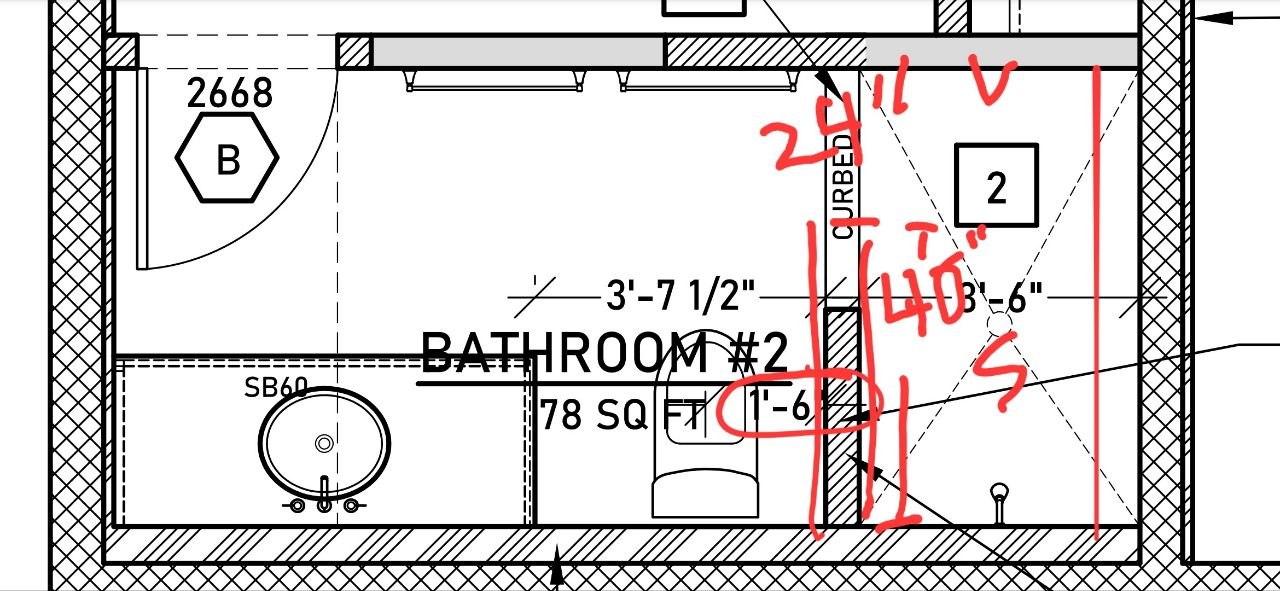
Marked Plan Reference
The marked Bathroom #2 plan is useful as the field reference because it collects the glass-block/shower measurements in one place and also marks the plumbing control locations. The handwritten dimensions should be sanity-checked against finished wall tile, curb, and glass block layout before final rough-in.
| Plan note | How to read it |
|---|---|
| Red 40″ note | Supports the preferred 40″ glass block wall length, which lines up with five nominal 8″ glass block modules. |
| Circled 1′-6″ dimension | Appears to call attention to the toilet-side clearance / glass-block-wall relationship that should be held during layout. |
| Printed 3′-6″ shower dimension | Shows the shower width/depth reference in the plan area; confirm against finished tile surfaces. |
| Red S | Marks the showerhead location shown on the plan. |
| Red V | Marks the volume control valve location shown on the plan. |
Working Layout
- Shower length: approximately 64″.
- Glass block wall: prefer 40″ instead of 39″ so it works cleanly with five nominal 8″ glass block modules.
- Toilet clearance: the edge of the glass block wall should be 18″ from the toilet centerline, matching the plan dimension.
- Doorless opening: approximately 24″ clear opening, which remains above the 22″ code-minimum clear opening discussed in the source conversation.
- Shower type: this downstairs guest shower has a curb; it is separate from the entry/main-floor curbless accessible shower.
- Fixture markup: the latest marked plan shows several field dimensions and identifies the showerhead as S and the volume control valve as V.
- Valve location: place the volume/control valve on the south wall.
- Showerhead location: place the ceiling rain head 18″ from the north wall, centered between the glass block and the front of the 3.5″ shelf at 42″ height on the west wall.
- Water control strategy: the extra wall length matters more than an extra couple inches of opening width for this doorless configuration.
Selected Glass Block Reference
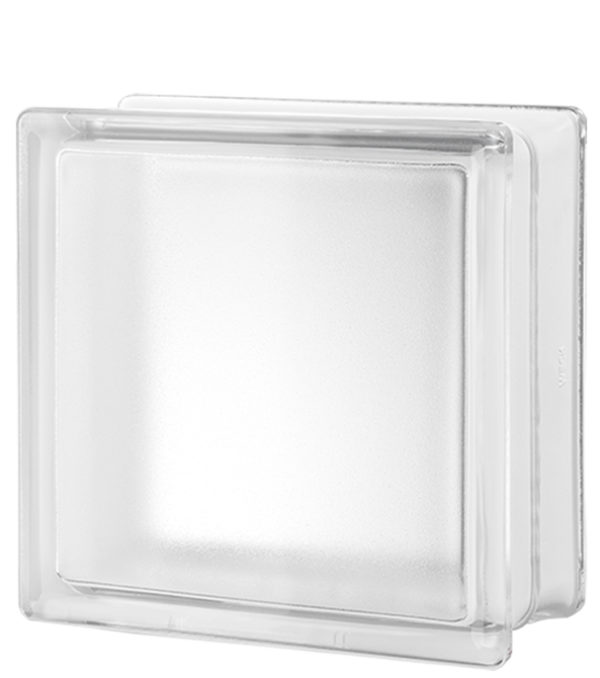
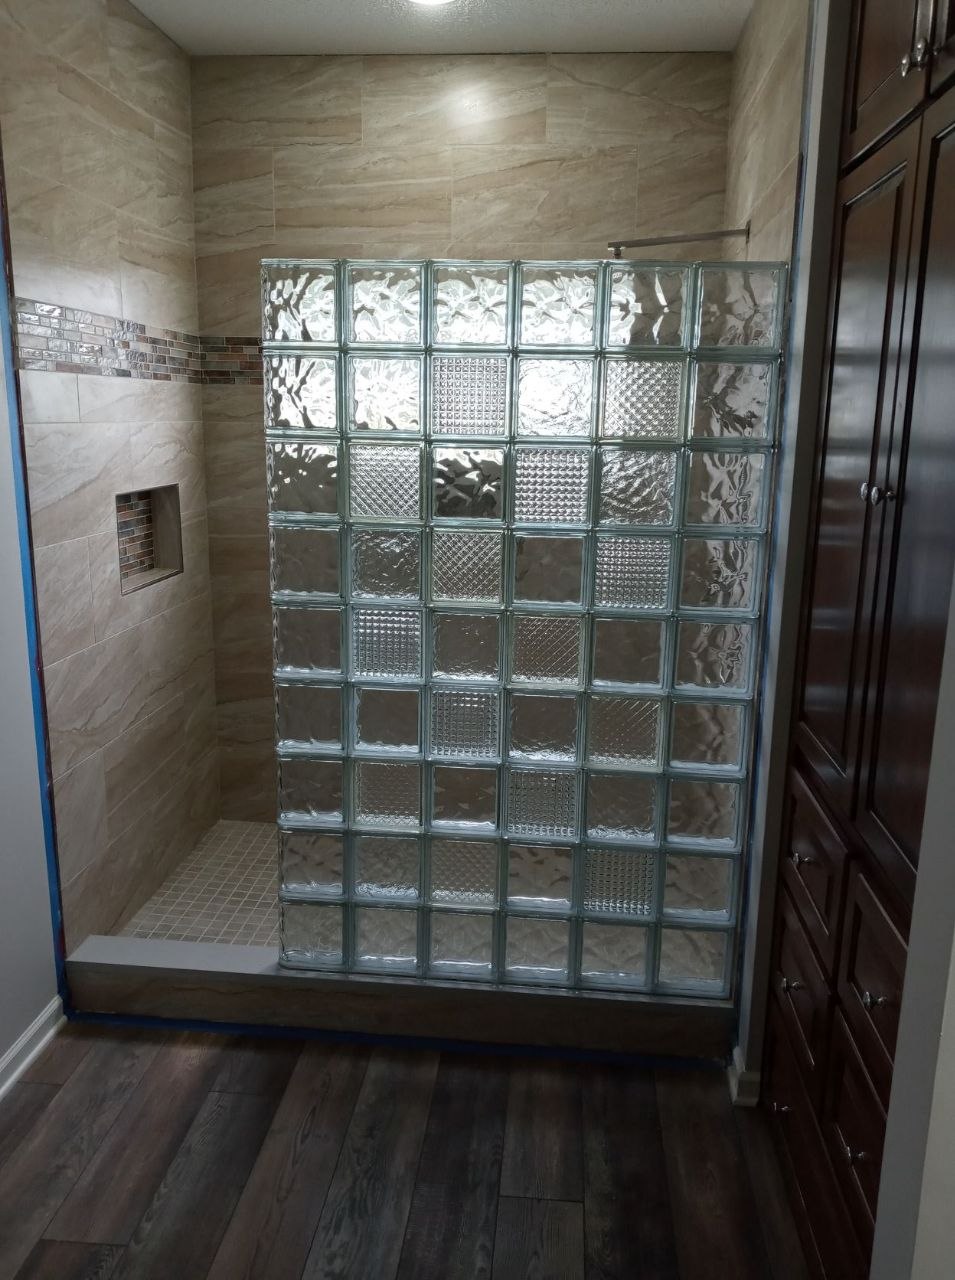
The current working product is Seves Arctic 8″ × 8″ × 4″ Mist Pattern glass block from Home Depot. It is the right nominal module for a five-block-wide 40″ wall, with the actual block listed at 7.75″ × 7.75″ × 3.88″.
Why 40″ Wall / 24″ Opening
A 39″ wall with a 26″ opening is close, but 40″ is a cleaner glass-block dimension and gives slightly better splash protection. Five 8″ blocks avoids cut blocks, awkward oversized mortar joints, or odd filler pieces at the end of the wall. The layout should also hold the plan dimension of 18″ from the toilet centerline to the edge of the glass block wall.
Opening feel
A 24″ opening should be workable for a downstairs guest shower. It will not feel as generous as a master shower, but it is wider than the 22″ minimum and helps the doorless layout function.
Splash control
In a 64″ shower, splash from a wall-mounted angled head can reach the opening. The design works better with a vertical-drop showerhead and the longer 40″ wall.
Block module
Nominal 8″ glass block modules make 40″ a natural width. This should look more intentional and cleaner than forcing a 39″ layout.
Ceiling Rain Head Placement
Because the shower is doorless, the showerhead should drop water vertically rather than spray toward the opening. A ceiling-mounted rain head is the preferred approach if the framing and plumbing layout allow it. The marked plan identifies the showerhead location with S and the volume/control valve location with V; those marks should guide rough-in coordination along with the dimensions below.
| Dimension / detail | Working guidance |
|---|---|
| Distance from north wall | Place the showerhead centerline 18″ from the north wall. |
| Closest practical placement | About 12″ from the wall is the practical lower bound; closer than that may feel cramped and can increase body-splash toward the opening. |
| Side-to-side placement | Center the rain head between the glass block and the front of the 3.5″ shelf at 42″ height on the west wall. |
| Valve location | Place the volume/control valve on the south wall. |
| Height | 84″ from the floor is a common comfortable rain-head height. Taller placements such as 90″–92″ can work, but may cool the water slightly and increase splash radius. |
| Spray pattern | Prefer a true rain head with vertical drop rather than a wide-angle or high-mist spray pattern. |
Ceiling plumbing support
For a ceiling-mounted head with PEX-A/Wirsbo, the ceiling termination should be solidly backed. A brass drop-ear elbow fastened to wood blocking between joists is the clean approach so the showerhead does not wobble. PEX support in the ceiling should follow manufacturer/plumbing practice to reduce movement, ticking, or water-hammer noise.
Glass Block Wall Structure
The wall is assumed to be 4″ glass block, approximately 3′–40″ long and about 6′ tall, supported by a slab floor and tying into a CMU wall. That slab-to-CMU condition is favorable, but a tall narrow glass block wall still needs internal reinforcement and a thoughtful movement joint.
Preferred hidden-support concept
- 4″ glass block: preferred over thinner block for this height.
- No exterior metal frame required if the masonry support plan is solid: the desired look is a floating glass block wall with reinforcement concealed in joints.
- Free end: consider a 1/2″ stainless threaded rod or stainless rebar epoxied into the slab at the open end, extending several feet up inside the vertical mortar joint.
- Horizontal reinforcement: stainless ladder wire in horizontal mortar joints, typically every second course / about every 16″, coordinated with panel anchors.
- CMU side: stainless panel anchors fastened to the CMU with masonry screws and embedded into the glass block mortar joints.
- Top course: the top ladder wire should tie into both the CMU-side panel anchor and the free-end vertical rod, creating a concealed steel “U” at the top of the wall.
CMU Connection and Expansion Joint
The visible finish at the CMU side can be silicone, but the structural connection should come from hidden stainless panel anchors. The joint between glass block and CMU should remain flexible because the two materials can move differently.
- CMU wall: masonry substrate for panel anchors.
- Stainless panel anchor: fastened to CMU and embedded in the glass block mortar joint.
- 3/8″ expansion foam strip: runs vertically between CMU and glass block as a movement buffer.
- Glass block mortar: encases the glass-block side of the anchor.
- Silicone finish: 100% silicone sealant over the recessed expansion joint to hide the foam and keep the joint waterproof while flexible.
Finishing the expansion joint
The foam strip is only a concealed movement/backer element. A clean finish would recess it about 1/4″–3/8″ from the face of the block on both sides, then seal with color-matched 100% silicone. Grout or mortar at this movement joint is less desirable because it is rigid and likely to crack.
Base / Curb / Waterproofing Items
- Curb: guest-friendly curb height is typically in the 4″–6″ range, while still meeting code relationships to the drain.
- Drain location: avoid placing the drain at the opening. Center or far-end placement is better for containing water.
- Slab base: glass block load and the free-end reinforcement should be coordinated with the slab condition.
- Waterproofing: hot mop or membrane integration at the curb/glass block base should be clarified before block installation.
- Movement isolation: use isolation/expansion detailing where rigid glass block meets CMU or other framing.
Open Items to Discuss with the Contractor
- Whether 40″ wall / 24″ opening works with the exact finished shower dimensions and chosen glass block.
- Confirming the edge of the glass block wall is set 18″ from the toilet centerline per plan.
- Preferred glass block system: traditional mortar, spacer/silicone system, or another manufacturer-supported approach.
- Specific reinforcement plan for a 6′ tall wall: panel anchor spacing, ladder wire spacing, free-end stainless rod, and top-course tie-in.
- How the 3/8″ expansion joint at the CMU will be detailed and sealed.
- How waterproofing will integrate under and around the glass block base/curb.
- Whether the rain head can be placed 18″ from the north wall and centered between the glass block and the front of the 3.5″ shelf at 42″ height on the west wall.
- Confirming the volume/control valve placement on the south wall.
- Whether local code, manufacturer instructions, or seismic considerations change any of these working assumptions.
Working Summary
“The preferred direction is a doorless guest shower with a modular 40″ glass block wall and roughly 24″ opening, using a ceiling rain head so water drops vertically instead of spraying toward the opening. For the glass block, I’d like to review a hidden reinforcement approach: 4″ block, stainless panel anchors into the CMU, ladder wire in the horizontal joints, a concealed stainless rod at the free end if appropriate, and a flexible 3/8″ expansion joint at the CMU finished with silicone. Please sanity-check this against the exact field dimensions, glass block system, waterproofing plan, and local code.”
Source: summarized from two shared Sidekick Studio discussions on shower entrance sizing, ceiling rain-head placement, and structural detailing for a tall opaque glass block shower wall.